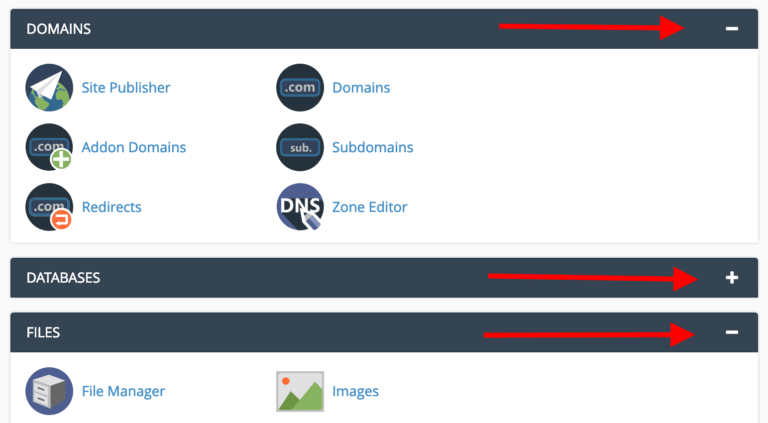
Reorganizing the Homepage
You can collapse sections by clicking on the “-” sign in the top right corner of each homepage section to minimize it.
If you like to, you can also drag and drop entire sections to reorganize them and put the most commonly used ones near the top.
Updating Your Preferences
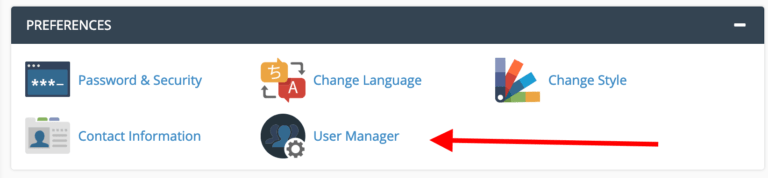
When you first log in to cPanel, make sure you visit the “PREFERENCES” section to update your contact information and change your password.
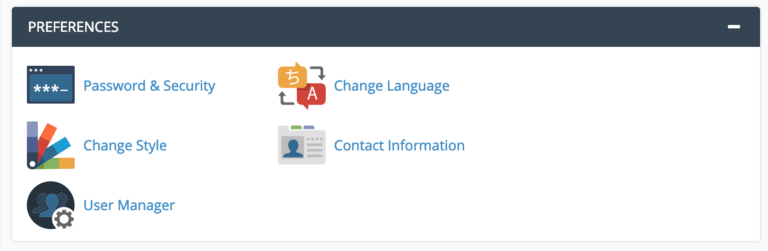
Below you’ll see how to do this step by step.
Changing Your Password
We strongly recommend changing your password as soon as you log in to cPanel for the first time.
Click on “Password & Security”. You’ll be taken to this screen:
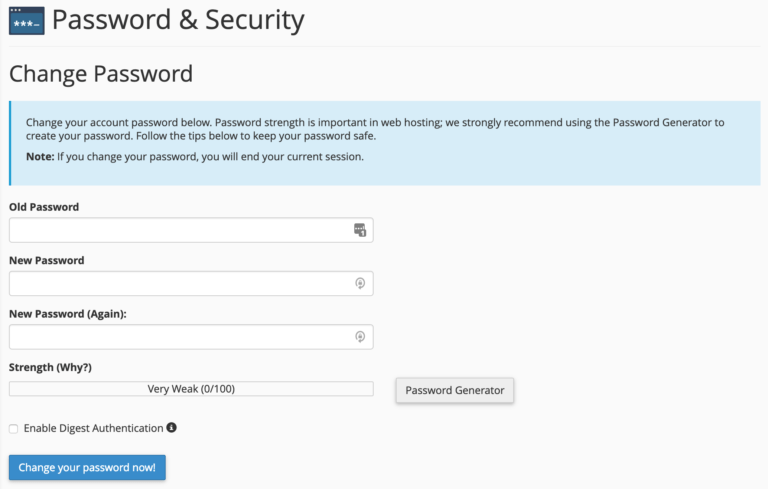
You’ll have to enter your old password before choosing a new one.
When it comes to setting up a new password, you can either take advantage of the Password Generator or come up with something on your own. Using the Password Generator is likely the right way to go, as it will give you a strong and secure password. Just click the button and let the generator take care of the rest:
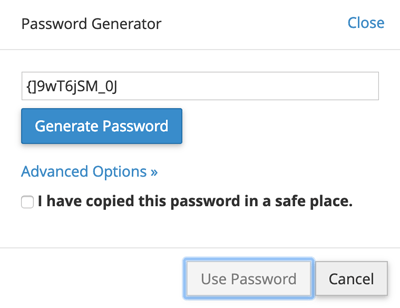
The best way to save that password is to use a password manager (like LastPass – free). That way, you don’t have to memorize the password. No matter what you do, DON’T save your password in a Word file or something similar on your computer – where it could be easily discovered.
Updating Your Contact Information
One of the most important things you must do in cPanel is to provide an email where you can receive updates when needed.
Why this step is crucial:
- Without a working email set in this section, cPanel won’t be able to communicate with you should anything significant happen with your configuration.
- You also must set the email address to one that’s not attached to any domain name that you’re hosting in this cPanel; otherwise, in case anything happens with your config, that domain might get compromised as well, hence making any attempt at communicating with you impossible.
To get to these settings, click on “Contact Information” to reach the following screen:
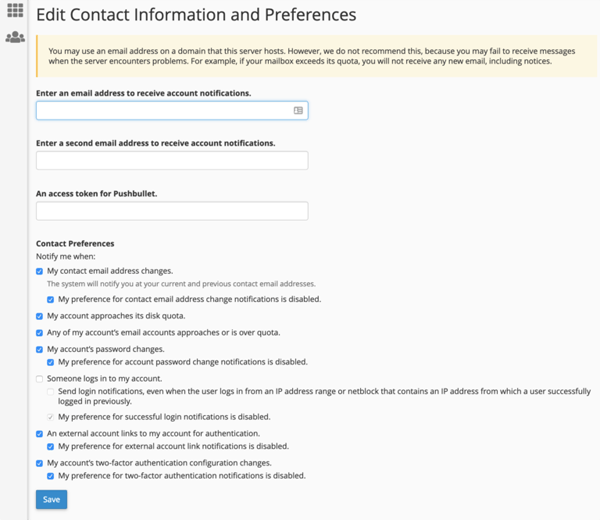
We recommend having all the boxes under “Contact Preferences” checked, as they’re all updates that could alert you to suspicious activities (e.g someone else changing your password) or a hosting problem (e.g disk space being used up).
Adding a New User
Let’s say you want to work with someone to help you manage your websites, or you have a trusted business partner who also needs access to the hosting setup. That person will require their own user profile in cPanel.
To do that, click on the “User Manager” icon that’s in the same “PREFERENCES” section.
You will be taken to the following screen:
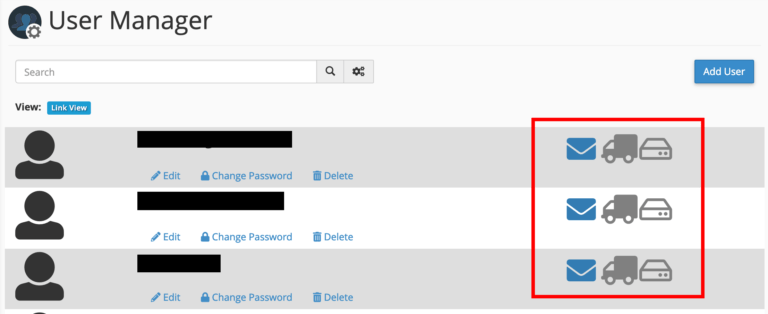
In that section, you can see all accounts that are currently set in your cPanel. There are three icons next to each account (you can see them in the screenshot above):
- the envelope icon indicates if the person has an email account set up in the system – if the icon is colored then there is an email account set up; if it’s grayed out, then there’s none
- the truck icon indicates if the person has an FTP account – again, colored for yes, and grayed out for no
- the disk icon indicates if the user can use the web disk services that are part of cPanel
You can easily edit any user there, change their password or delete them with the options listed below the account name.
To add a new user, click on the “Add User” button in the top right corner:

You’ll then be taken to the following screen:
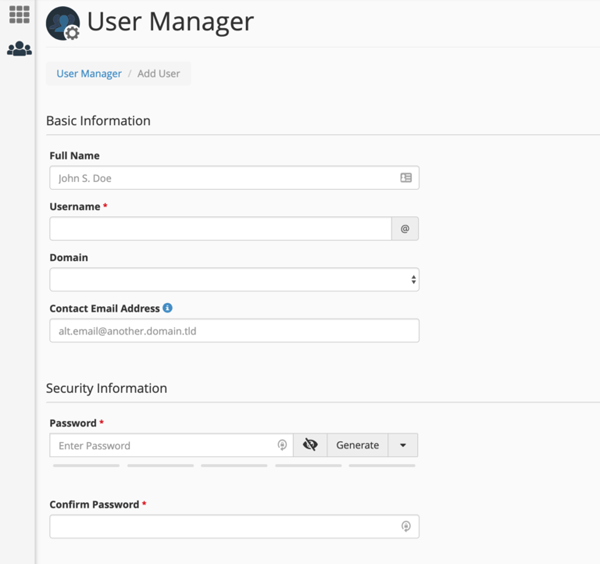
You’ll add the user’s full name, the username, the domain that the new user should be associated with and if you want, an alternative email that the user can be reached at.
You’ll also be asked to create a password for the user.
Just below these fields, you’ll find a section called “Services” where you can take care of a handful of key settings. Interestingly, they correspond to the three icons that we described just a couple of paragraphs above:
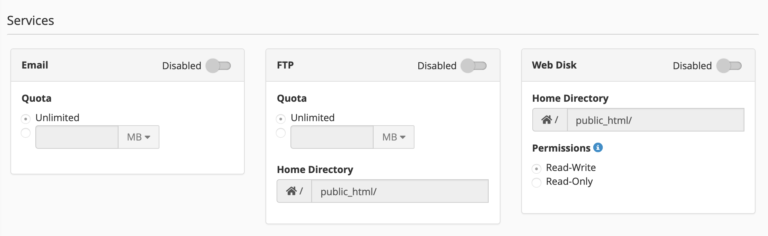
- Email allows you to enable/disable email accounts for the new user and also set a limit for how much space each account can have.
- FTP allows you to enable/disable accounts from being able to access your hosting setup via FTP. FTP can be used to upload files to your website. You can choose what directory the new user will have access to, and limit the space they can use.
- Web Disk permissions should be reserved for your top-level admin accounts only. “Read-Write” level access gives the user full permissions to do pretty much whatever they wish within the specified directory (including deleting files)! “Read-Only” only permits reading, downloading and listing files.
When you’ve finished with these settings, click on “Create” or “Create and Add Another User” at the bottom of the settings page.